Flashing Firmware Using the Forced Download Tool
1. Connecting the Computer and Development Board
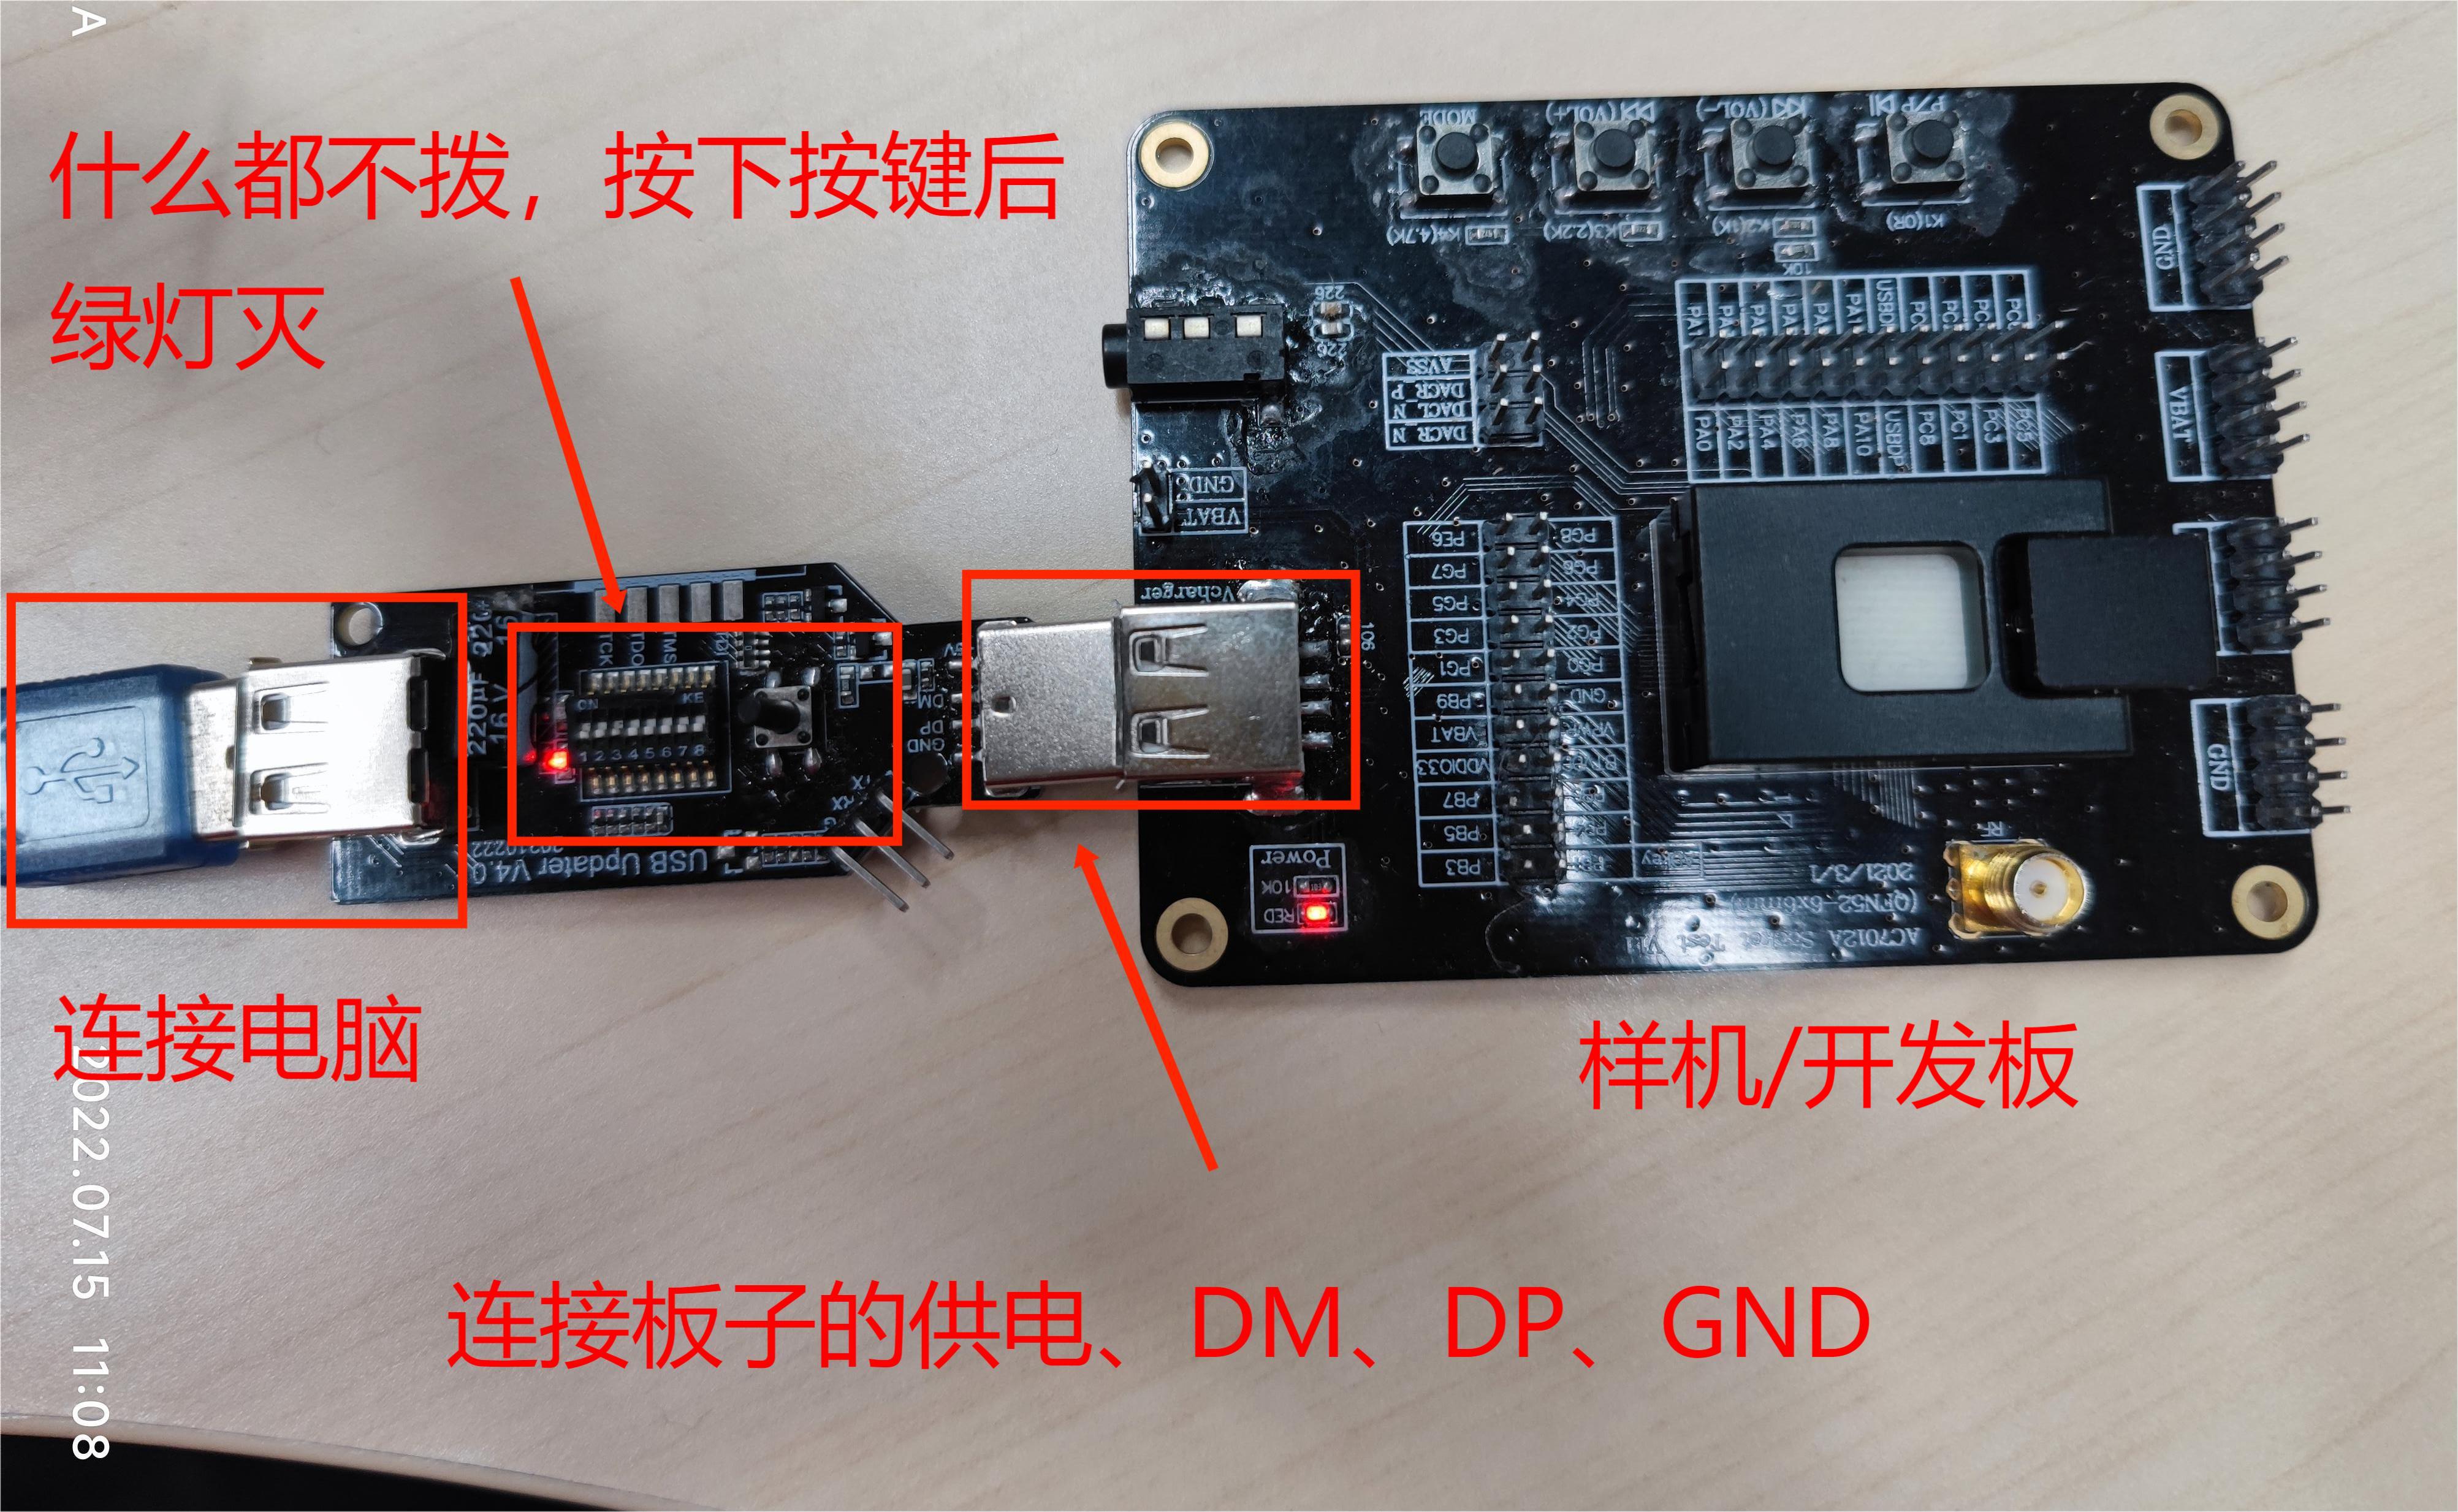
Connect the USB female port of the forced download tool to your computer, and the USB male port to the prototype or development board. (Note: Do not connect in reverse. Please refer to the image below for the correct connection.)
- The specific steps are as follows:
- Connect the devices correctly according to the instructions in the image.
- The green and red lights on the forced download tool will start flashing.
- Press the button on the forced download tool—the green light will turn off and the red light will stay on.
- At this point, you can flash the program to the development board.
For more detailed information, please refer to: Upgrade and Download Instructions.
2. Flashing the Firmware
After connecting the computer and development board, press the button on the forced download tool. When the green light is off and the red light is on, you can start flashing.
-
Click TASK EXPLORER > SDK > vscode > all to automatically execute the build and flash tasks.
-
When the terminal shows that the UFW file has been generated, the flashing is complete.
-
Press the button on the forced download tool again; the green and red lights will start flashing, and the development board will run the flashed program.
